

GridLock
Requires macOS 26 or later
GridLock puts windows exactly where you want them. Drag a window to the top of a display and a palette of layouts drops down: let go over a zone and the window snaps into it. Or press a shortcut, see the window on a grid, and draw the cells it should fill. Every desk you work at keeps its own grids and palettes, so windows land the right way wherever you plug in.
Free. Signed and notarized by Apple.
New: Command line and AI agents. With the gridlock command, Claude Code, Codex and your own scripts can snap windows to your layouts and grids, list your displays and desks, and change grid settings. MCP apps such as Claude Desktop get the same through gridlock mcp.
Works with ToolHUD
ToolHUD
Press one shortcut and pick from a ring of buttons around your pointer to show the grid, open the palette, snap the front window to a half, the whole display or the center, or undo the last move, or to run features of the other apps on this site. No hard-to-remember key combinations. While ToolHUD runs, GridLock's menu bar menu moves into ToolHUD's menu too, so one icon holds them all.
Drop a window on a layout
Drag any window by its title bar to the top edge of a display. A palette of layouts drops down, each one split into zones. Move over a zone and an outline shows exactly where the window will go and how big it will be; let go and it snaps there.
Set the gap between windows and the margin around the edges for each display, and Undo Move puts the last window back where it was, up to 10 moves back.
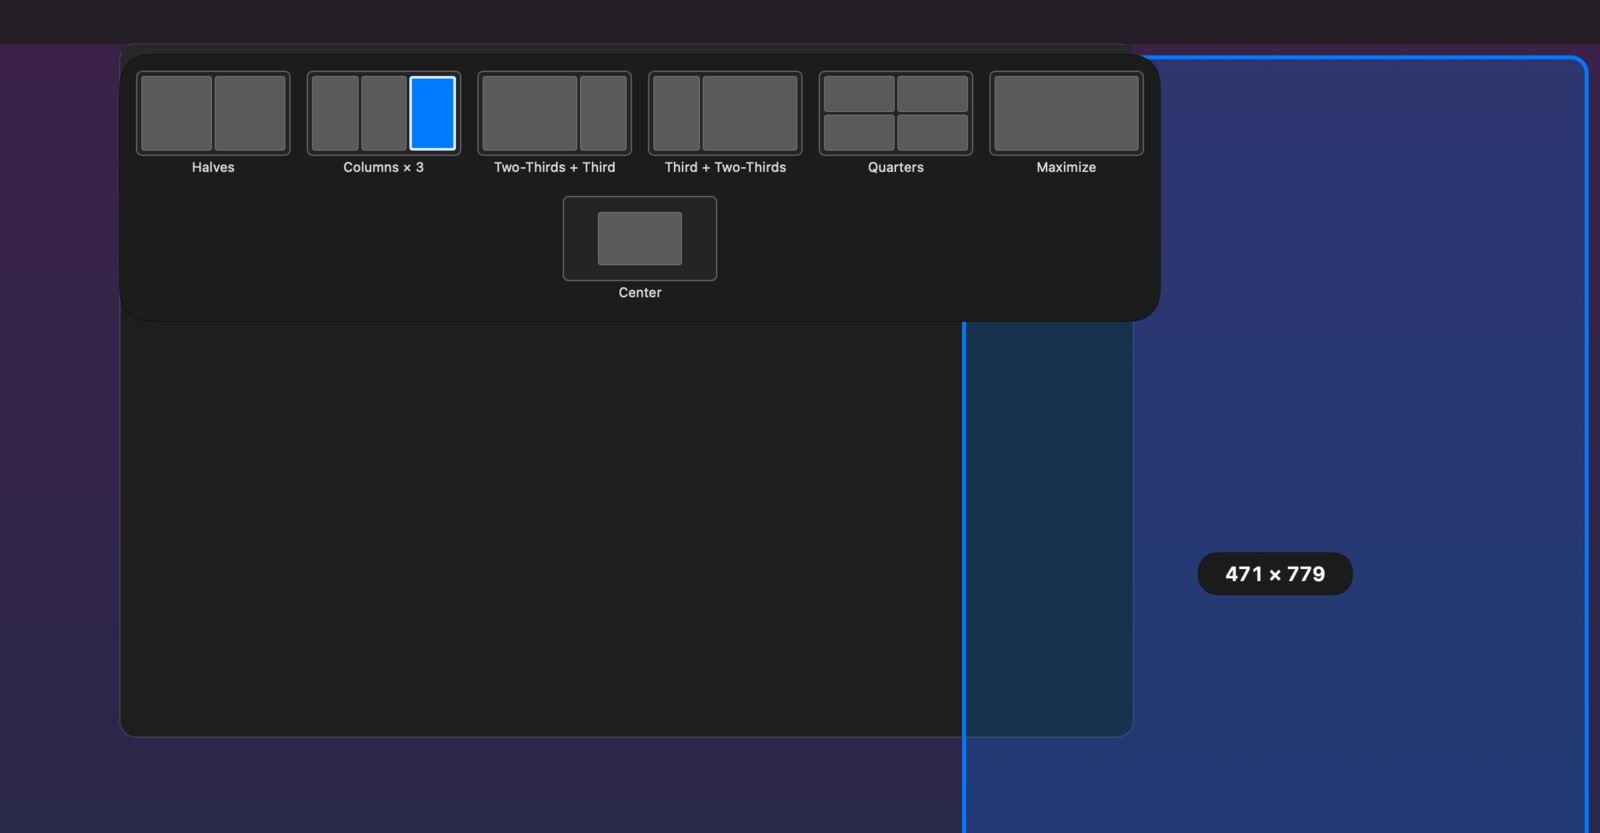
The palette, with the right third of Columns × 3 under the pointer and its outline on the display.
Skip the top edge
Pushing a window against the top of the screen can also wake Mission Control. Hold ⌘ while you drag, or any keys you choose, and the palette opens right away just above the pointer, wherever the window is.
Or keep your hands on the keyboard: press ⌃⌥P and the palette opens for the window in front. Click a zone and the window snaps there.
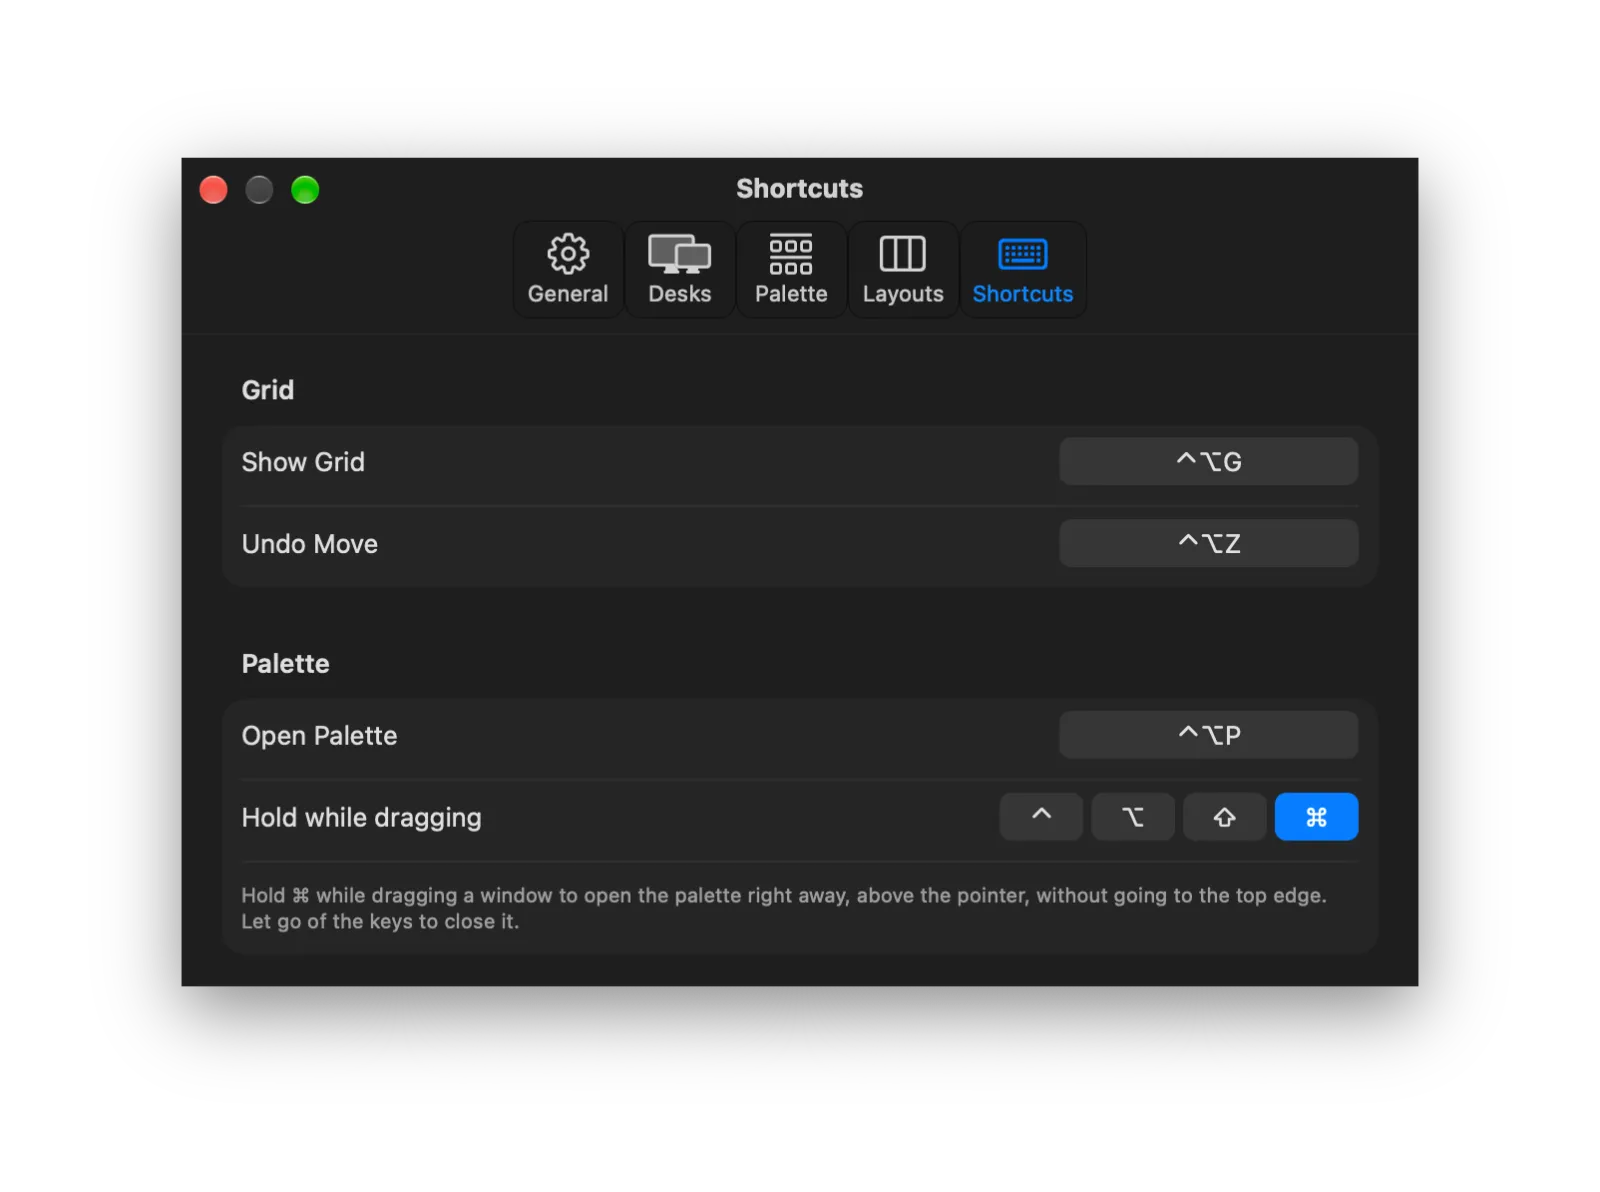
Settings, Shortcuts: the Open Palette shortcut and the keys to hold while dragging.
Draw it on the grid
Press ⌃⌥G to see the front window on a grid, with its name, size and cells. Drag across cells to choose new ones, or use the arrow keys: arrows move, ⇧ grows, ⌥⇧ shrinks. Let go, or press Return, and it snaps.
Each display has its own grid: 6 × 4 on a wide monitor, 3 × 6 on one turned on its side, or any size you like, up to 24 columns and 16 rows.
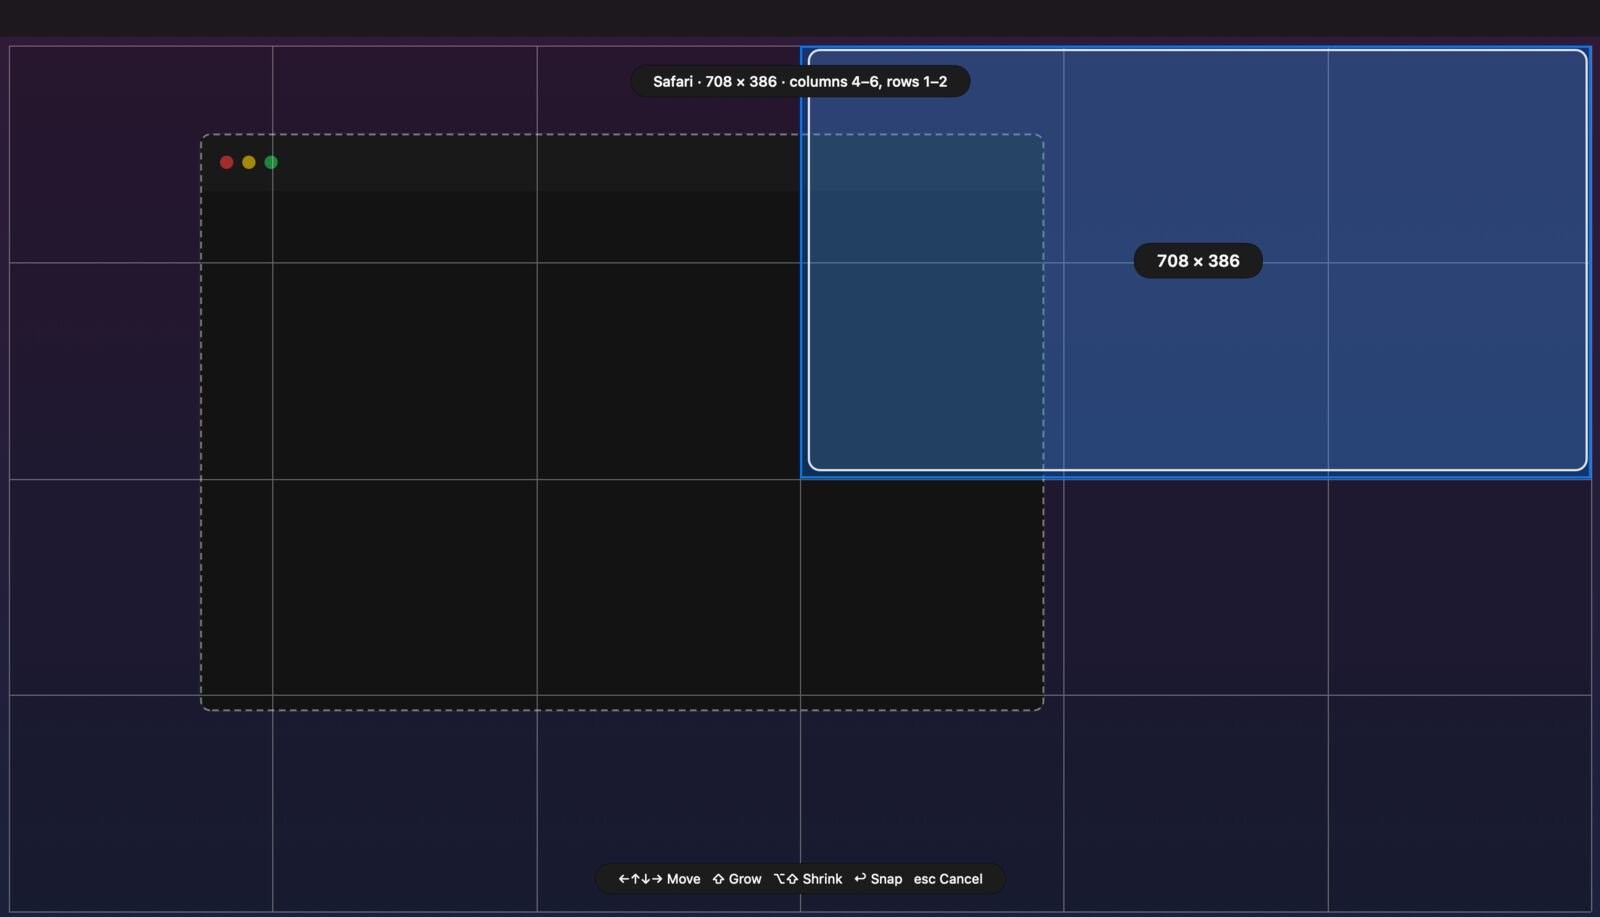
Show Grid on a 6 × 4 grid, with columns 4 to 6 of rows 1 and 2 chosen for Safari.
Every desk remembers
A desk is a set of displays, recognized by their serial numbers. Each display at each desk keeps its own grid and its own palette, so the same laptop can have one setup at home and another at the office.
Plug in and GridLock switches on its own. A desk it hasn't seen starts from the most similar one it knows, and your desks are copied to iCloud Drive for safekeeping.
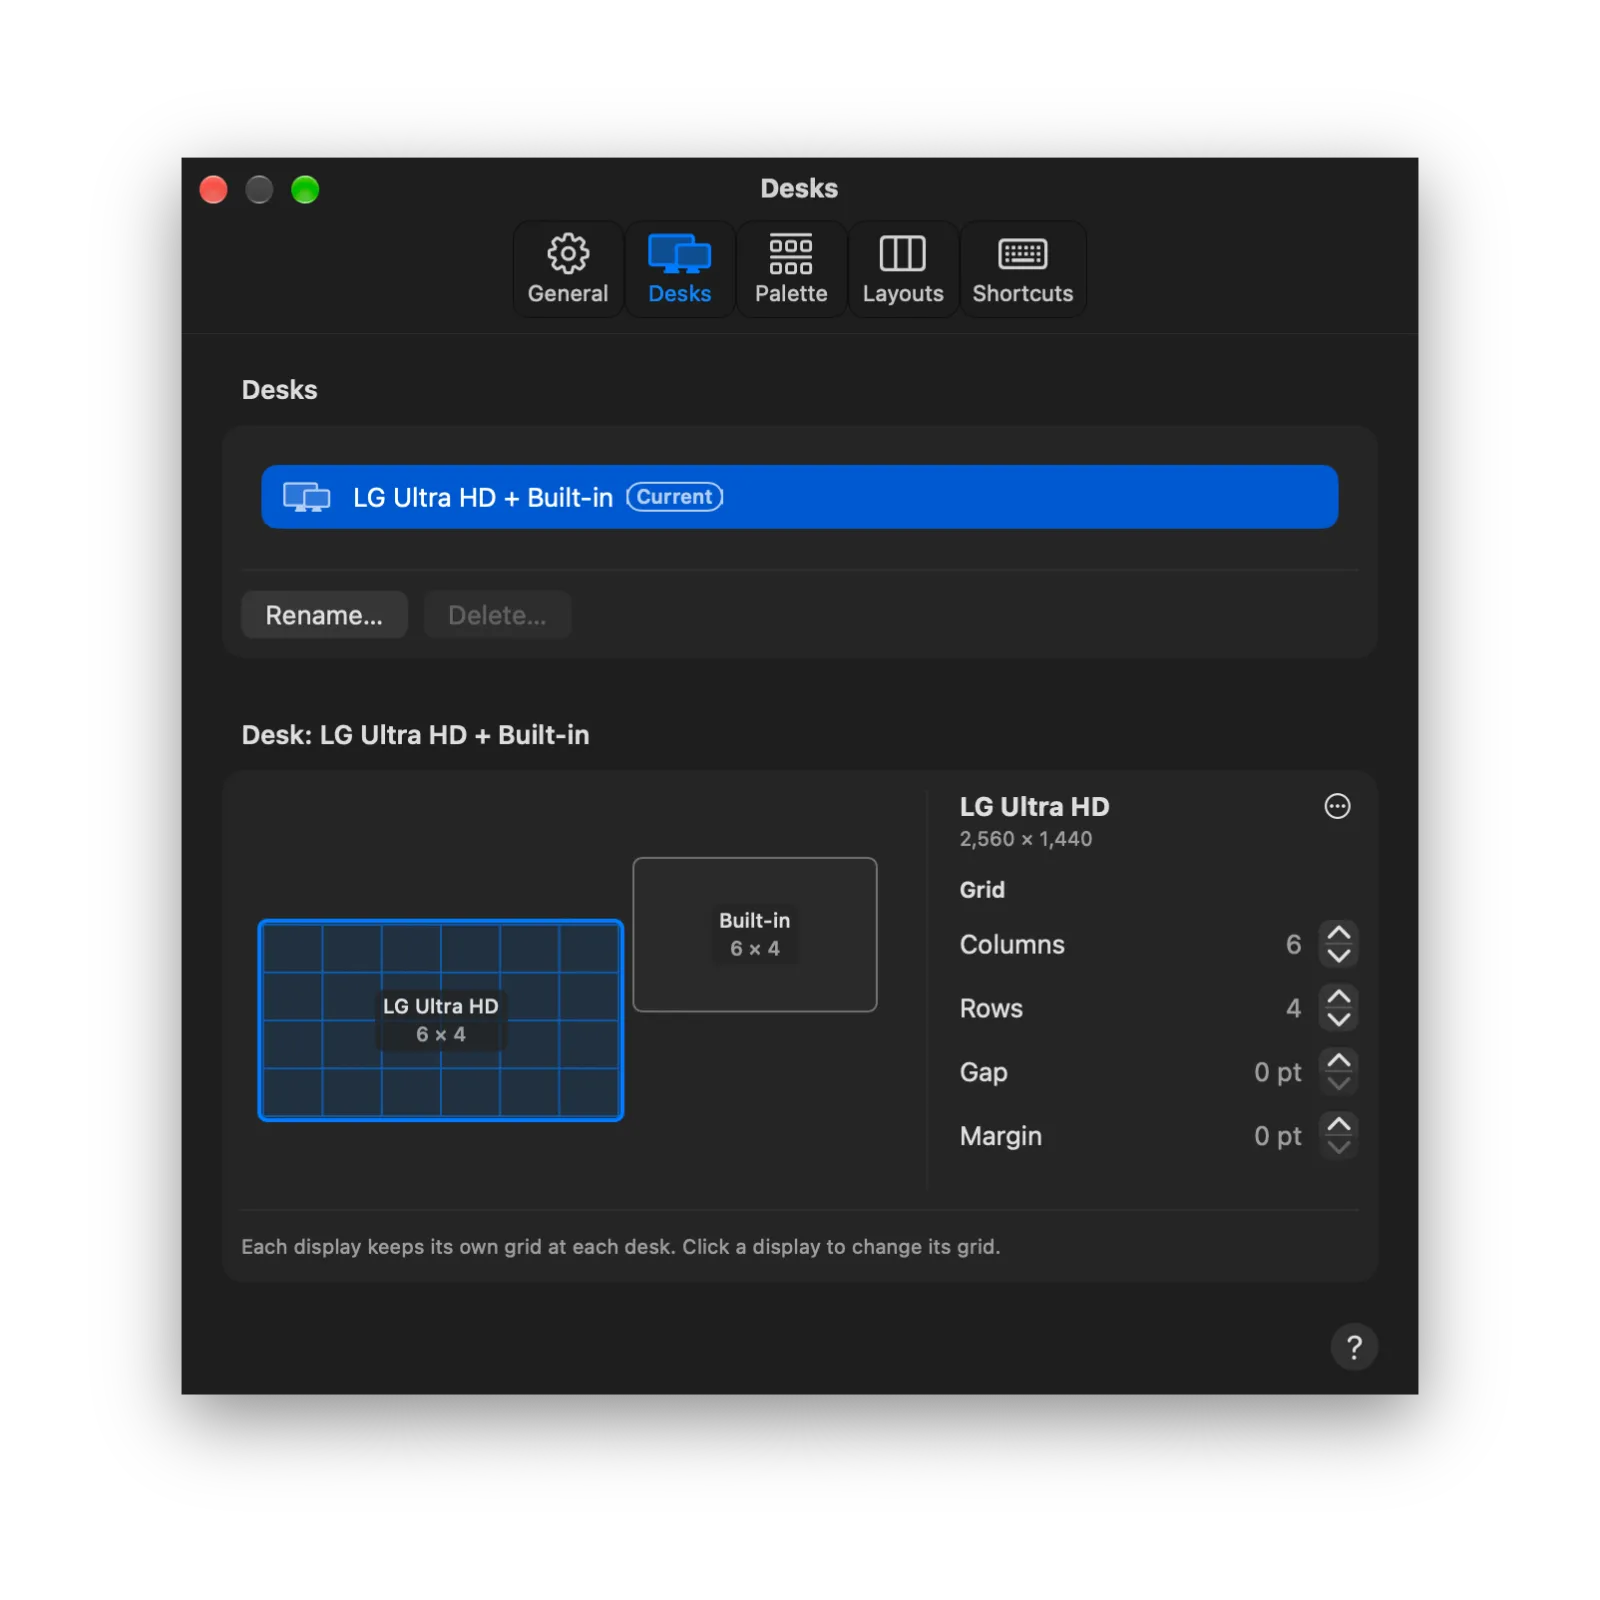
Settings, Desks: the current desk, its displays drawn to scale, and the grid of the one selected.
Your palette, your layouts
Choose which layouts each display's palette shows, and in what order: halves, columns, rows, grids, splits, maximize and center. A family has a count, such as Columns × 3 or Grid 3 × 2, and can appear more than once.
Need something else? Draw your own layout in the layout editor, zone by zone, and add it to any palette.
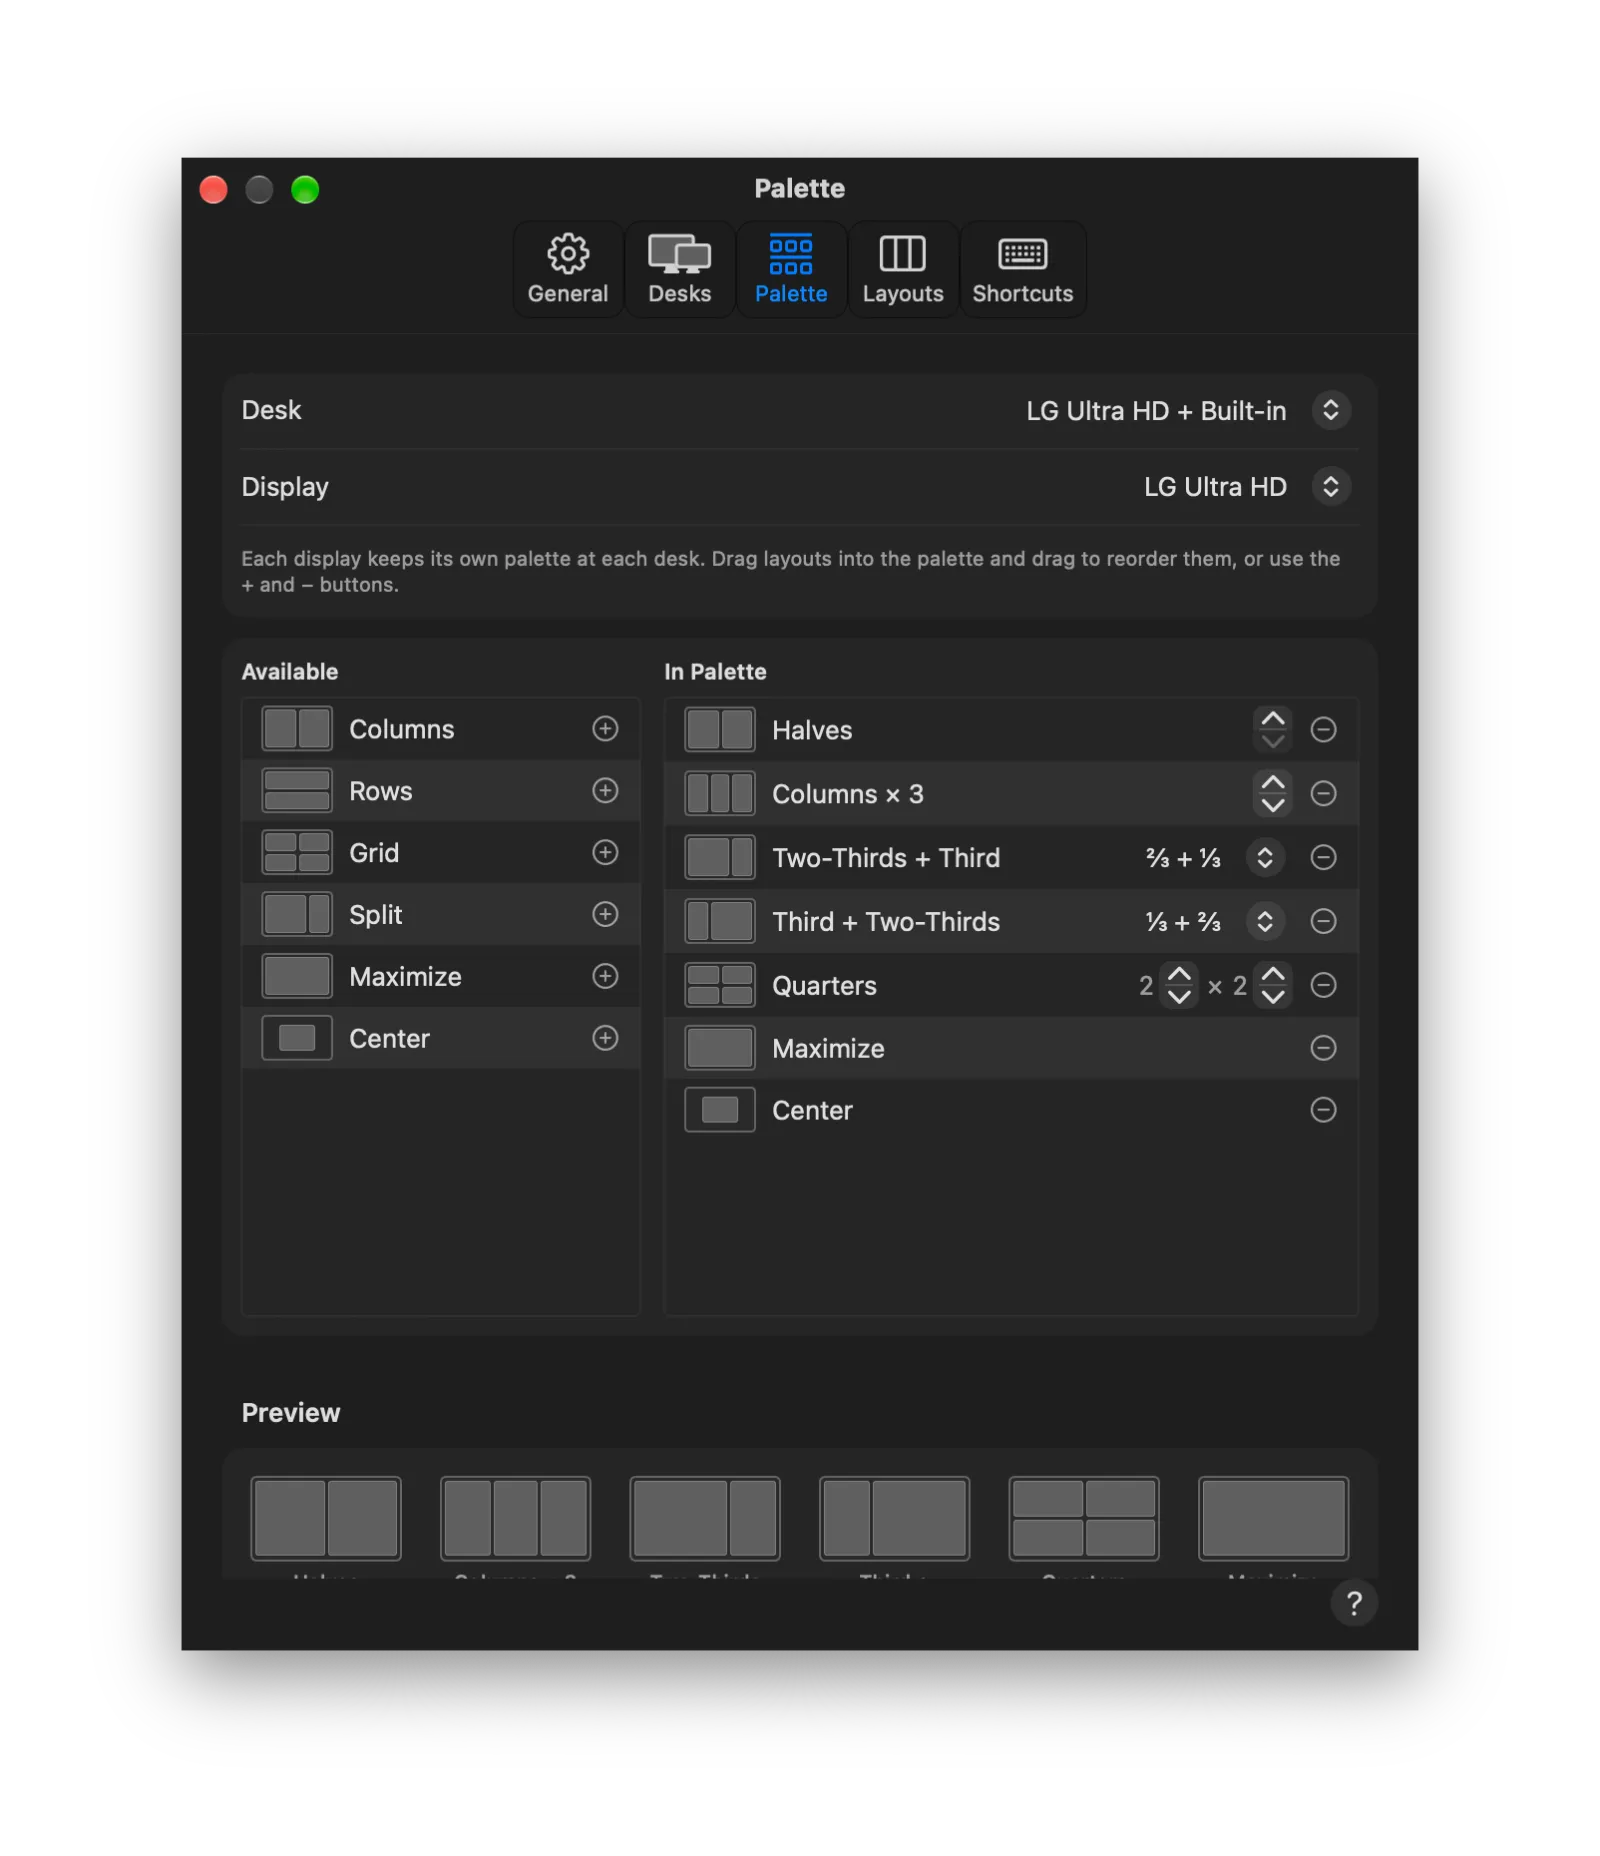
Settings, Palette: layouts to add on the left, this display's palette on the right.
Works with your other apps
ToolHUD shows GridLock's actions as buttons, and GridLock's menu can live inside ToolHUD's menu. ShortcutsLens lists GridLock's shortcuts, and when WindowKeeper already knows a desk, GridLock uses the same name for it.
gridlock:// links show the grid, open the palette, snap the front window to a zone or undo the last move from Shortcuts, scripts and ToolHUD.
What it does
The palette
Drag a window to the top edge and drop it on a zone.
No edge needed
Hold ⌘ while dragging, or press ⌃⌥P and click a zone.
Show Grid
See the front window's cells and draw new ones, by mouse or keys.
A grid per display
Columns, rows, gap and margin for each display at each desk.
Desks
Recognized by serial number and switched on their own when you plug in.
Your palette
Pick its layouts, their counts and their order for each display.
Custom layouts
Draw your own zones and add them to any palette.
Shortcuts for every zone
Press a half's shortcut again for two-thirds, then a third.
Next display
Send the window to another display, keeping its share of the grid.
Undo Move
Put the last window back where it was, up to 10 moves back.
Help and sync
Searchable Help built in, and settings that follow you to every Mac through iCloud.
Your Mac, your way
Show it in the menu bar, the Dock, both or neither, and choose System, Light or Dark.
Getting started
Open the downloaded disk image and drag GridLock to Applications. Open it, then turn on GridLock in System Settings, Privacy & Security, Device Control and Data Access (Accessibility on older macOS). It needs this to move and resize other apps' windows.
If macOS's own "Drag windows to screen edges to tile" is on, Settings, General says so and opens the right page of System Settings; GridLock never changes it itself. Open Help from the GridLock menu, with ⌘?, or with the ? button in any Settings pane.
Updates
GridLock checks for a new release once a day, or on a schedule you set in Settings, from every hour to once a year. You also choose what happens: Ask me first, where a notification and the menu offer it and nothing installs until you click, or Install automatically, where it waits until the grid and the palette are closed, no app is keeping the screen awake and your Mac has been idle for 2 minutes. Each download must be signed by the same developer and notarized by Apple before it is installed, and your settings carry over. Each update shows what changed.
Under the hood
GridLock is a native Mac app written in Swift. It moves and resizes windows through the Accessibility interface and recognizes displays by the serial numbers they report. It never launches apps, never moves windows between Spaces and never changes macOS's own tiling settings. Your desks live in a small file on your Mac, copied to a folder for this Mac in iCloud Drive.